The Council of Blood
Guida in italiano qua!
Cliccate su Leggi Tutto per la guida completa in inglese!
Council of Blood Quick Tips in Castle Nathria
-
Focus on killing one boss at a time. Recommended order: 1st: Baroness Frieda 2nd: Castellan Niklaus 3rd: Lord Stavros
-
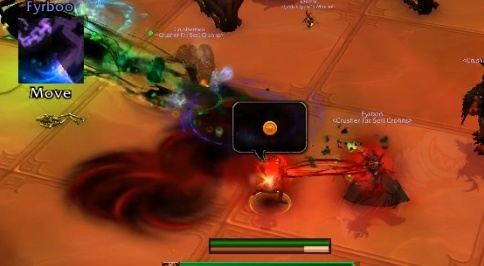
When a boss reaches 50%, get to your dance position and then move to the your marker over and over again until the dance ends.
-
Stay within the dance floor area whilst fighting the bosses to avoid the
 Party Foul damage. This doesn't apply during the
  Danse Macabre.
Baroness Frieda
-
Interrupt her
 Dreadbolt Volley casts. Dispel the debuffs applied if a cast is accidentally let through.
 -
Spot-heal players targeted by the
 Drain Essence.
 -
1 Boss Dead: Spread out when
 Prideful Eruption is cast.
 -
2 Bosses Dead: Taunt half-way through the
 Soul Spikes to have each tank hit by two spikes each.
-
Taunt swap after two
 Duelist's Riposte casts
 -
Nuke down the Dutiful Attendant add which is making the lowest health boss immune!
-
1 Boss Dead: CC and kill the Dredger Servant which deal low damage to random people.
-
2 Bosses Dead: Tank the Veteran Stoneguard and kill it as soon as possible.
-
Face away from other players when tanking this boss due to the
 Evasive Lunge. Taunt swap after 2 casts.
 -
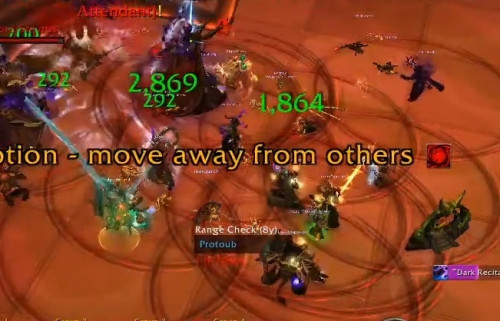
When paired up with
 Dark Recital, find your partner and keep moving from the patches you spawn!
 -
1 Boss Dead: Move away from the
 Waltz of Blood dancers.
 -
2 Bosses Dead: Find the single Dancing Fools that can be killed. Kill them and stand near their corpse for a safe spot!
Boss Death & Ability Generation
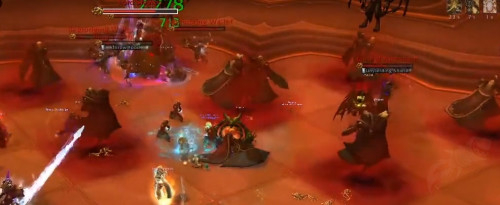
This fight begins with the raid dealing with all three bosses simultaneously.
-
The bosses have separate health pools and when one dies, the others heal to full. This makes cleaving/multi-dotting pointless, unless it gives you a DPS increase on the primary kill target.
-
Each boss has a unique set of abilities that the raid needs to counter. When one boss dies, the remaining bosses gain one new ability.
-
The new abilities gained by the bosses does not depend on the boss killed, the bosses only check if another boss has died and do not check which boss died.
As this encounter can be defeated by killing the bosses in any order you like, we will list all boss mechanics and how to deal with them.
-
Due to very large (and very late) changes to this encounter, it is difficult for us to give a definitive “best” kill order.
-
Instead we recommend that you kill the bosses in an order that removes the most problematic abilities for your raid team.
-
Baroness Frieda is mainly a problem if you struggle to keep track of interrupts, as her Dreadbolt Volley deals very high damage if not kicked.
-
Castellan Niklaus is mainly a problem if you have weak AoE/cleave damage and add control, especially with his
 Castellan's Fury on heroic difficulty.
 -
Lord Stavros is a problem if you have players who struggle with heavy movement and awareness, as his Dark Recital ability can be very disruptive.
-
Our estimate is that most groups will find the easiest kill with the following kill order: 1#Lord Stavros -> 2# Baroness Frieda -> 3# [npc=166971.
-
This kill order will be updated once this boss is encountered on live servers!
-
Each player will then have an area of the room be illuminated by a spotlight. This location is unique for each player.
-
The raid has 8 seconds to get into position. Any player who does not reach their location within 8 seconds will be instantly killed.
-
To help each player reach their position in time, the raid should be loosely placed towards the centre of the room, as the locations can spawn across the entire dance floor.
Every time a boss reaches 50% health, all bosses and adds will retreat to the starting balcony and will take 99% reduced damage.
Once in position, the raid will be joined by several servants which will join in the dance.
-
The raid will be told to either: Prance Forward, Shashay Left, Boogie Down, or Shimmy Right. Players simply need to move their characters one "square tile" in that direction.
-
Each successful step grants the player a stack of
 Fancy Footwork, granting 3% haste for 20 seconds. This will stack for each successfully executed dance step.
 -
If you fail to move to this place, you will lose your Fancy Footwork stacks and take ever increasing damage from
 Wrong Moves. This damage will end once a move has been completed correctly or the dance ends.
 -
After performing several (6) of these moves (the actual amount for normal/heroic difficulty is unknown), the Intermission phase will end and the bosses will return to the fight space once more.
Beta Test Note: The
Throughout the encounter, the raid will be passively gaining stacks of
-
This debuff deals low shadow damage every second, but as the stacks get higher the damage can become overwhelming.
-
The stacks are only reset upon killing a boss or by triggering a Party Foul Intermission.
-
This acts as a damage check, as players need to keep triggering events that reset the stacks as to keep the damage survivable.
-
Healers may wish to save healing cooldowns and use them during points in which the
 Oppressive Atmosphere stacks are at their highest.
Whilst fighting the bosses, players must stay on the "dance floor" encounter space and avoid the raised area around it, as several guards are defending these areas.
-
Any player who enters this space will be knocked back onto the dance floor and take a minor amount of damage.
-
This is easy to do, but players just need to be aware that they should stay away from the edges of the space when dodging other mechanics.
-
The defenders disappear during Party Foul intermissions, as players can be forced out of the dance floor area whilst performing their steps.

Stay on the "dance floor" area whilst directly fighting the bosses!
Baroness Frieda
Dreadbolt Volley
Baroness Frieda will frequently cast -
This cast must be interrupted at all times, as the Dreadbolt Volley damage can easily lead to healers falling behind.
-
During most recent testing, this cast required two 14 second cooldown interrupts on a rotation to prevent the spell from being cast.
-
If the spell does accidentally go through, healers should be ready to use healing cooldowns to cover the extra damage the raid is taking.
Drain Essence
Every ~20 seconds, Frieda will channel -
This deals moderate shadow damage every second to several randomly selected players over 4 seconds.
-
This cast cannot be interrupted. Instead, healers must spot heal those players to ensure their survival.
1 Boss Dead: Prideful Eruption
If Frieda isn't killed first, she will gain the -
This deals a large burst of shadow damage to all players in the raid. Each player will also splash this damage to all others within 6 yards.
-
To counter this, players should look to be spread at least 6 yards from one another.
-
This ability can overlap with others, so players should pay close attention to the timers to make sure they don’t run near others when Prideful Eruption being cast.
2 Bosses Dead: Soul Spikes
If Frieda is the last boss alive, she will frequently cast -
This 4.5 second long channel will send a total of 4 Soul Spikes at her target. Each spike deals a large burst of physical damage an increases damage taken from subsequent spikes for 4.5 seconds.
-
Each Soul Spikes also radiates a portion of the damage dealt to the primary target to all other players as shadow damage.
-
Tanks will want to taunt after 2 spikes have gone out, as to make it so the ability deals the least damage possible.
Duelist's Riposte
CastellanCastellan Niklaus will frequently cast -
This deals a burst of physical damage and increases damage taken by the ability by 100% for 25 seconds. This will stack.
-
To keep stacks under control, tanks should taunt off of one another after the ability has been cast twice. This lines up with Lord Stavros’ Evasive Lunge stacks. it.
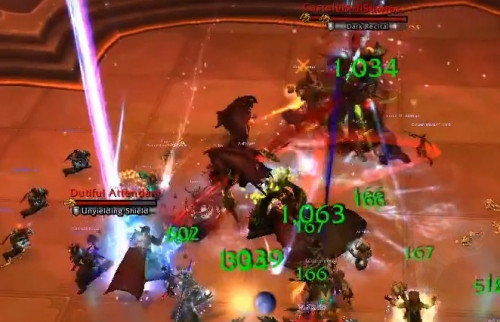
 Unyielding Shield
Castellan Niklaus will occasionally spawn a Dutiful Attendant add which will move over to the boss with the lowest % health and channel the -
This causes the effected boss to become immune to all damage until the attendant add is killed.
-
As this damage immunity will always be applied to the “kill target” boss, DPS should instantly focus down this add so that they can damage the kill target once again.
-
This add does not need to be tanked and cannot be interrupted, but can be displaced.
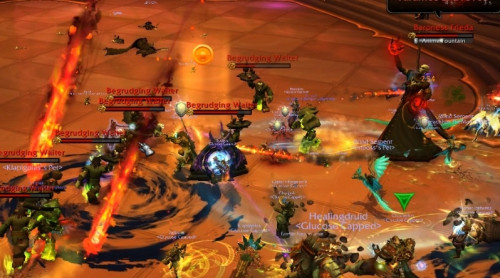
1 Boss Dead: Dredger Servant
If Castellan Niklaus isn't killed first, he will gain the ability to summon Begrudging Waiter adds.-
These adds will spawn along the sides of the dance floor and will spam cast
 Throw Food at random players, dealing low nature damage.
 -
These adds can (and should) be displaced and crowd controlled, allowing the raid to stack them up easily to kill them off quickly.
-
It is important that the raid kills of these adds quickly, especially when a Danse Macabre phase is due to start as you don't want to have adds attacking you during that phase.
2 Bosses Dead:  Castellan's Cadre
If Castellan Niklaus is the last boss alive, he will frequently cast -
This add needs to be tanked as it will deal heavy damage with its melee attacks and will cast
 Sintouched Blade on its tank.
 -
This deals a large burst of physical damage whilst granting the add a permanent 50% damage dealt increase which can stack.
-
The raid should look to DPS this add down quickly to ensure that its damage increase stacks do not get too high.
-
Tanks should keep the add near the boss so that DPS can cleave damage onto Castellan Niklaus whilst focusing damage onto this add.

Lord Stavros
Evasive Lunge
Lord Stavros needs to be tanked and will frequently cast -
This teleports Lord Stavros behind his current tank. He will then instantly charge through the tank and continue along this path for 20 yards.
-
Anyone caught in this charge will take a substantial burst of physical damage and take 100% increased damage from Evasive Lunge for 25 seconds.
-
An easy way of thinking about this is to think that the tank is going to shoot out a 20 foot narrow beam in front of them when the ability is cast.
-
Make sure you are not facing other players when this ability is cast. This way only the tank will be hit.
-
The tanks should taunt off of each other after two Evasive Lunge casts. This lines up with Castellan Niklaus’ Duelist’s Reposte stacks.
Dark Recital
Lord Stavros will frequently cast -
These players will be taking damage every 0.5 seconds whilst they are further than 8 yards away from their partner.
-
Afflicted players can see who their partner is as they will be connected to them with a red beam.
-
The players will also be spawning zones underneath themselves which detonate after a moment, dealing high shadow damage to anyone within them.
The two marked players should find one another as soon as possible and stay close to each other, whilst moving to avoid their own zones that they are spawning.
-
All other players should avoid these players as they move as to avoid the pools that the pairs are spawning.
-
To minimise the damage taken by the pools left by the ability, the raid should look to loosely spread out to give more safe spaces for people to dodge into.
1 Boss Dead: Waltz of Blood
If Lord Stavros isn’t killed first, he gains access to the -
When cast, a section of the dance floor will be descended upon by Waltzing Venthyr. These adds will occasionally shift around in that area.
-
Anyone who touches an add will take moderate shadow damage and be stunned for 1 second.
-
As soon as the raid sees where the Waltzing Venthyr spawn, they need to move away from those locations as to not get caught in the spinning paths.
-
These adds cannot be interacted with in any way.
2 Bosses Dead:  Dancing Fools
-
This will coat the entire dance floor with ghostly dancers. Players cannot interact with them.
-
Shortly after spawning, all adds will begin to cast
 Violent Uproar. Upon completion, each add will deal a near lethal burst of damage to all players within 11 yards.
 -
Due to the positioning of the adds, this Violent Uproar will cover the entire dance floor space.
-
Players have the 13 second duration of this cast to kill this add as to create a small safe space within the room.
-
The entire raid should move over towards this add so that when it dies they will already be within the safe zone.
Heroic Difficulty Council of Blood in Castle Nathria
Last Boss Abilities
Each boss has gained one additional ability or effect when they are the last boss standing on heroic difficulty.Baroness Frieda gains  Twisted Pain.
-
This causes players to spawn pools of
 Manifest Pain at their location whenever they take damage from her abilities.
 -
Manifest Pain deals moderate shadow damage every half second to anyone who stands within it. These pools last 30 seconds.
-
With the addition of Soul Spikes during this phase, this will lead to a large amount of pools spawning.
-
Players will likely want to move as a group each time this spell is cast to keep pools stacked up.
-
Players will then want to loosely spread for the Drain Essence channel, whilst still trying to place themselves in low traffic areas.
Castellan Niklaus gains Castellan's Fury.
-
This causes any of his adds to grant a 100% damage increase for 18 seconds to all other adds within 12 yards when they die.
-
Players will want to make sure that the Veteran Stoneguard does not receive this buff by either not killing the []npc=169925] adds at all, or by moving the stoneguard away from these adds before they die.
-
npc=169925 adds should be stacked up as much as possible and killed off at the same time -- ideally whilst under a crowd control effect as the pack begins to die.
-
The Dutiful Attendant doesn’t gain anything from a damage increase, but the raid needs to be aware that his death will buff other nearby adds.
-
Do note: The damage buff only applies to other adds, not the boss.
Lord Stavros gains  Two Left Feet.
-
This causes all players to gain stacks of Two Left Feet every time they move, reducing their movement speed by 2%. This stacks up every 0.3 second of movement.
-
When standing still, players will lose stacks at a fast rate. This debuff can also be removed by abilities that counter “movement impairing effects” such as Dispersion or Blessing of Freedom.
-
This ability is problematic as many of Lord Stavros’ abilities cause players to move around: Dancing Fools, Dark Recital and Waltz of Blood.
-
Players need to “ration” their movement as to make sure that they have the movement speed available to them for when they need to move from boss mechanics.
Mythic Difficulty Council of Blood in Castle Nathria
 Dancing Fever
At any point during the fight, aside from during the -
Each player will receive 3 stacks of the debuff which lasts 30 seconds. If the debuffs expire, the player is instantly killed.
-
The only way to remove the debuff is to jump. Doing so removes one stack from the player whilst dealing a moderate burst of shadow damage to the raid.
-
The raid needs to coordinate to remove all debuffs from players in a staggered way so that the incoming raid damage is as smooth as possible.
-
The raid may also want to remove multiple debuffs simultaneously whilst using cooldowns, especially if removing the debuffs has to be delayed due to other incoming damage.
You need all five players to jump 3 times before their debuffs expire.
Afterimages
Whenever a boss is defeated, an unattackable enemy is left behind. This enemy will cast one of that bosses abilities.-
Afterimage of Baroness Frieda : This add will cast Dreadbolt Volley. This boss should be defeated near the middle of the encounter space so that she is in range for players to kick her.
-
Afterimage of Castellan Niklaus: This add will summon Dutiful Attendant. Players need to be prepared to nuke this add throughout the fight whenever it appears.
-
Afterimage of Lord Stavros: This add will cast Dark Recital. This forces players to continue to maintain a loosely spread position even when Lord Stavros is killed.
-
These adds will not cast any abilities during the Party Foul phase.